 Every year we have a wood fire in Ceramics. We have been doing the wood fire at MSU for about 3 years now. This year I
have quite a bit invested in this firing. My Cheeratah bones will be
going into this fire as well as 4 cups. It takes about 4 days to prepare
and fire it. And is an exciting process to be a part of.
Every year we have a wood fire in Ceramics. We have been doing the wood fire at MSU for about 3 years now. This year I
have quite a bit invested in this firing. My Cheeratah bones will be
going into this fire as well as 4 cups. It takes about 4 days to prepare
and fire it. And is an exciting process to be a part of.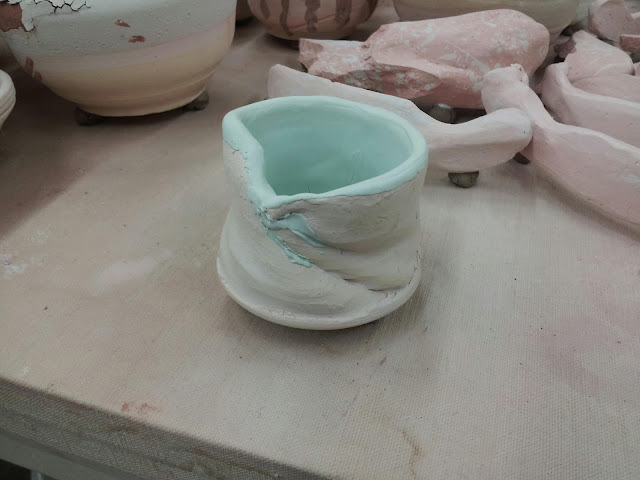
So the wood fire is a very interesting form of glaze fire. There are two major types of firing, bisque firing which takes a piece and takes the water out of the piece. It hardens the clay and makes is stable and strong. A glaze fire gives the piece color. There are varies types of glaze fires including wood, soda, raku, oxidation and reduction to name a few.
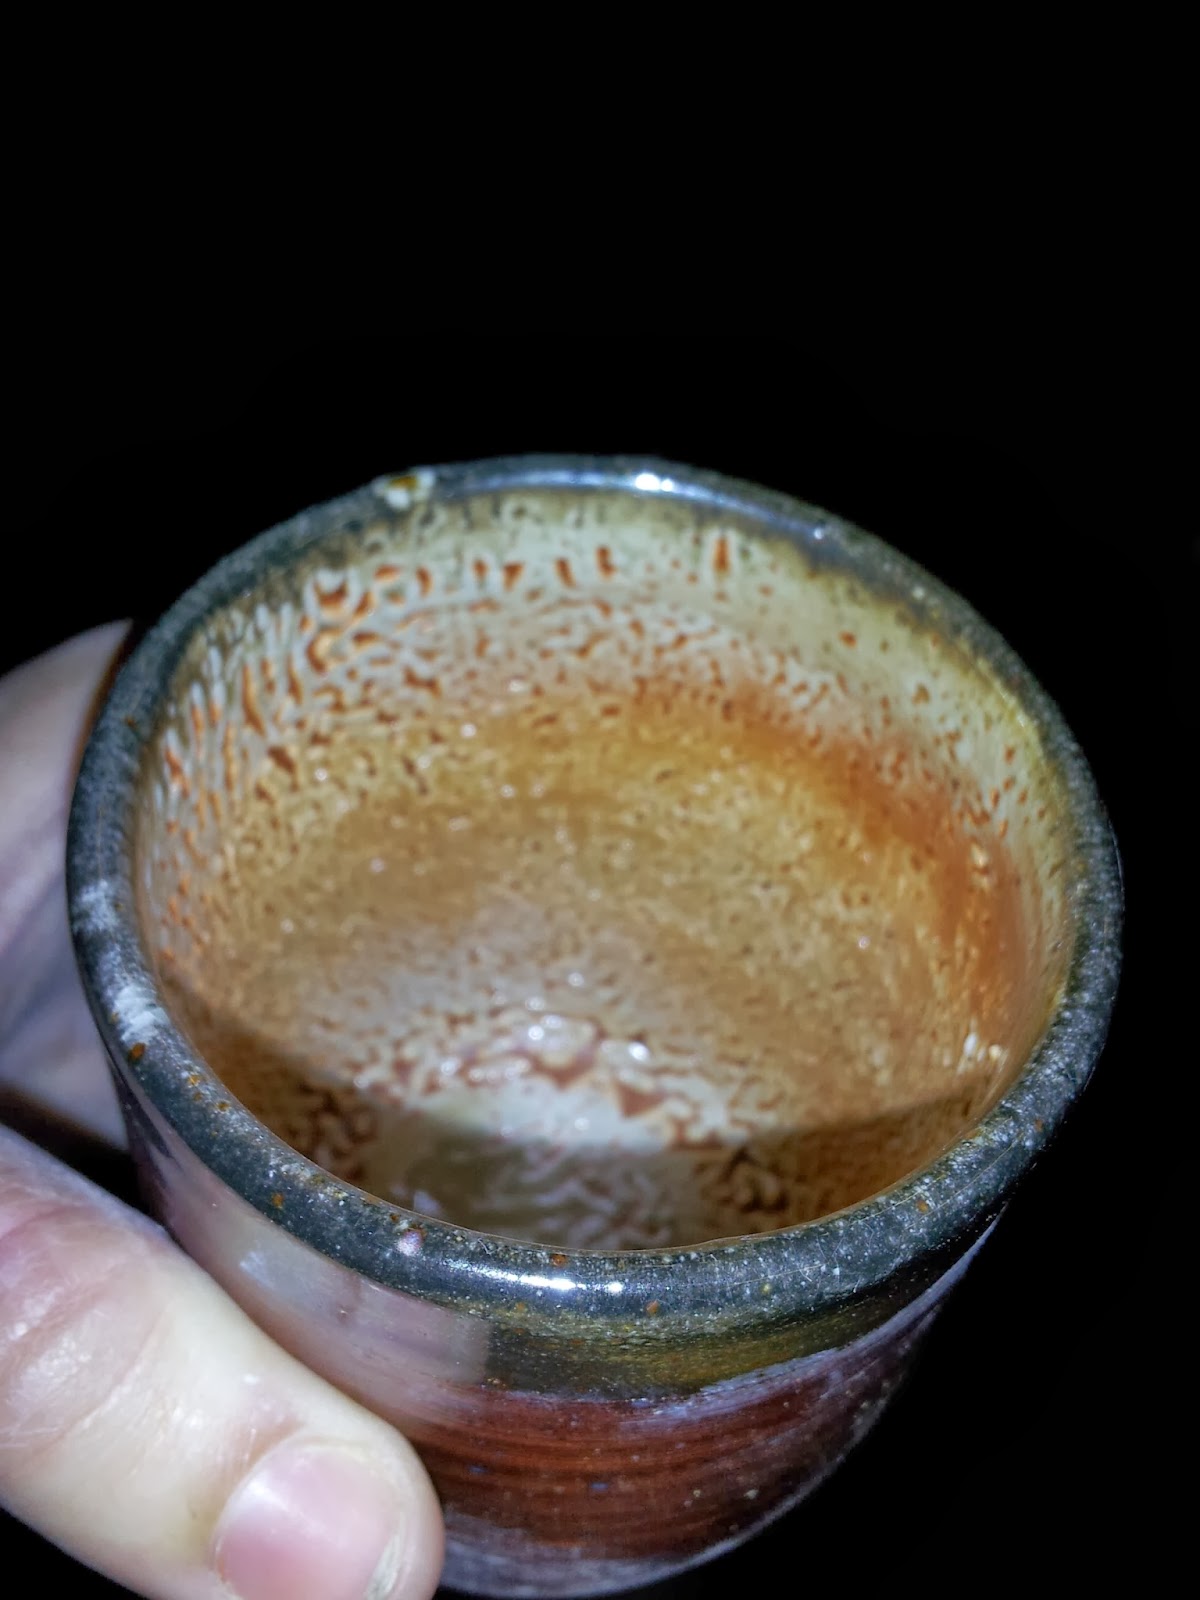
A wood fire uses natural wood to heat the kiln (a very large super oven) up to cone 10 which is 2350 degrees Fahrenheit. As the wood burns, it releases hot ash into the kiln which clings to each piece. This ash is the reason many artist fire wood kilns. Because of this we don't glaze the whole cup because we want the ash to create the color. We do however glaze the inside and the lip of the cup (shown in this picture). This glaze is food safe which mean that you can actually drink out of it after it's fired. With out this type of glaze you would get sick from drinking or eating off the piece.
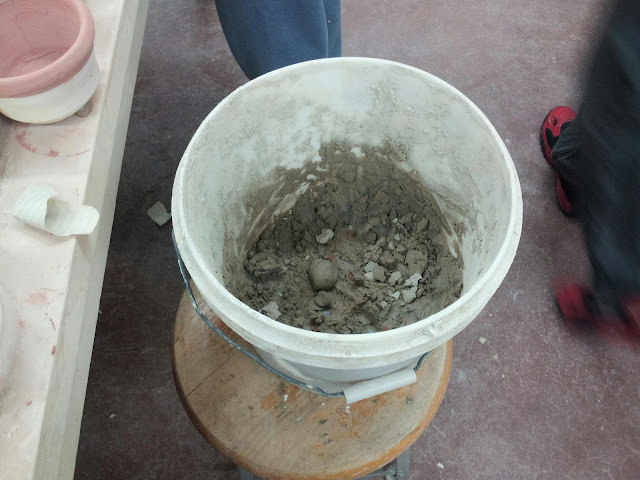
 This gunk is very important. It is called Wading. We use this material
on the bottom of the pieces. It lifts the piece off the kiln shelf and
keeps it from sticking.
This gunk is very important. It is called Wading. We use this material
on the bottom of the pieces. It lifts the piece off the kiln shelf and
keeps it from sticking. Glaze is an interesting material. We mix powders with water to create a liquid. This liquid is then put on a cup and as it dries it fills the pours of the cup and clings to the piece. If you were to touch the dried glaze it would flack off. When we put it in the kiln the glaze becomes a liquid again (it is basically liquid glass with other stuff in it...but that is a tutorial for another day) This liquid runs as it is fired and then as the kiln cools it hardens and forms the glaze most people are familiar with, colorful and permanently stuck to a cup.
As the ash flies around in the wood kiln it also sticks to the cup and creates even more gooey liquid that runs down the side of the pot. The wading keeps the glaze from sticking to the kiln shelf. Without it you would have a nice big hunk of stone attached to the bottom of your cup which would make it very difficult to drink out of. It would make a nice giant expensive coaster though.
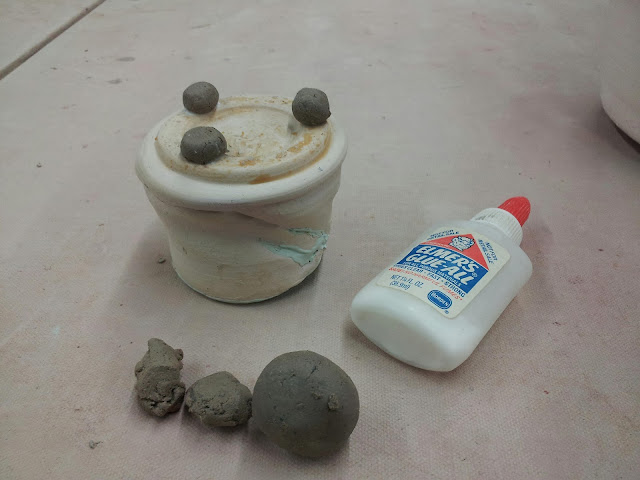
The wading is taken and rolled into small balls. It is then glued into place on the bottom of the cups. We use regular school glue because it will stick enough to make it through loading it in the kiln without falling off but we can still knock the little buggers off after it is done firing.
Sadly, these places will not be exposed to the atmosphere or conditions (wood ash flying around) so they will remain the color of the natural clay body. So if you ever flip over a cup (without liquid in it, of course) and you see little circles you know that wading was used in those spots!
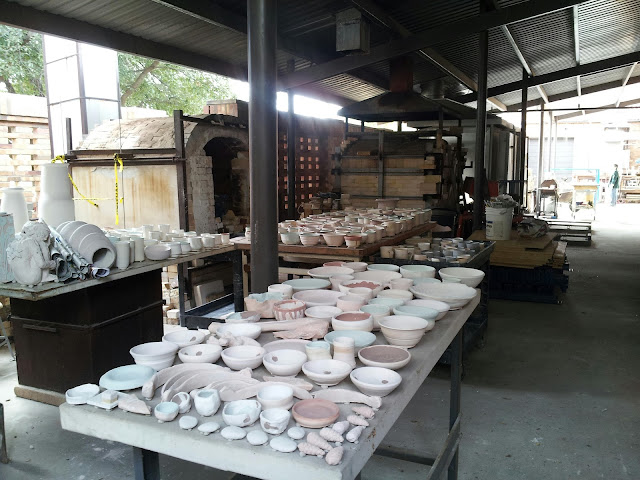
All of the pots are placed outside in size order which makes it easier to stack them in the kiln.
We have seven outdoor kilns (4 shown) and three indoor. The other kilns seen in this picture (left to right) are our soda kiln, a kiln used for burning out investment for the sculpture students' bronze projects, and two computerized gas kilns. One is used primarily for bisquing and the other for glazing. All four of these kilns run on gas.
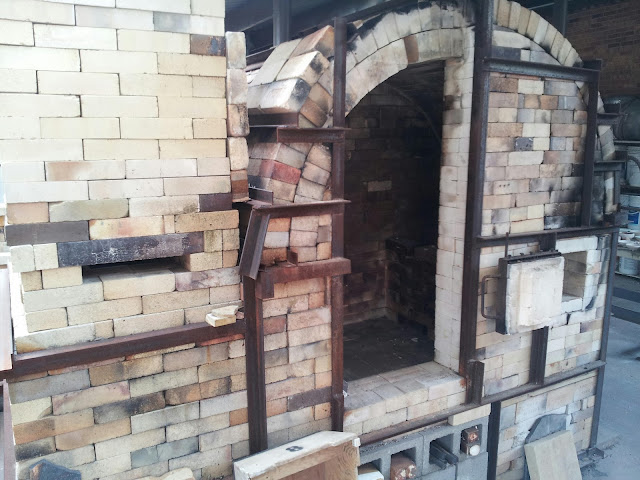
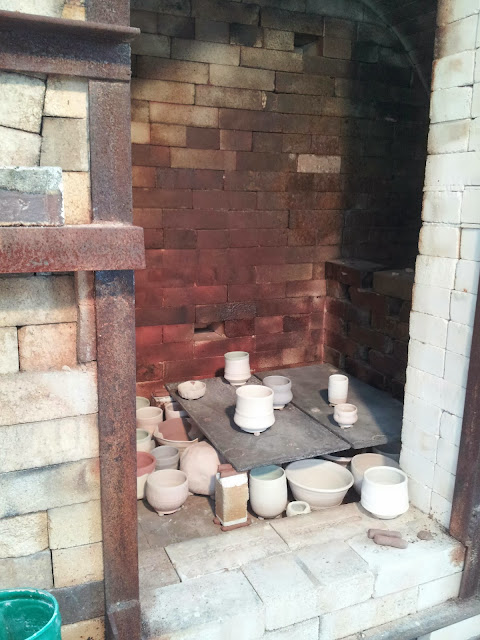
In the picture to the left is our wood kiln. you can see the base of the chimney on the left and the door where we chunk in the wood on the far right. The large opening is where we will stack the pieces that are going to get fired. The kiln is made out of hard bricks and steel and will be hot to the touch when it is being fired.
So to give you and idea of whats going to happen, the kiln is separated into three basic chambers. The first is the one that houses the fire itself. The second is where the pots are and the third is the chimney.
In the first chamber, the wood gets placed in the door and the fire's base is where the kiln meets the concrete (two feet lower than the door). As the heat rises it hits the top of the arched roof and is sent into the second chamber where the pots will be. Because of the arch of the roof the flame will actually swirl around in the second chamber a few times before getting sucked into the third chamber, the chimney.
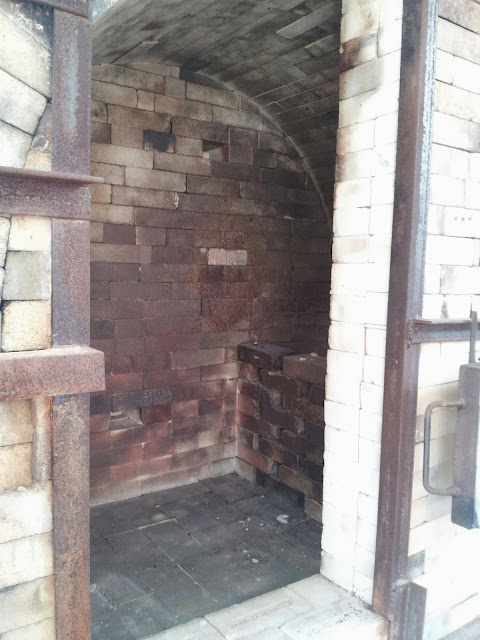
To the left is a better view of the inside of the kiln. You can see the low wall on the right which separates the top part of the fire from the second chamber. You can see on the roof and wall where the ash has hit the bricks as it was fired. These bricks were once white.
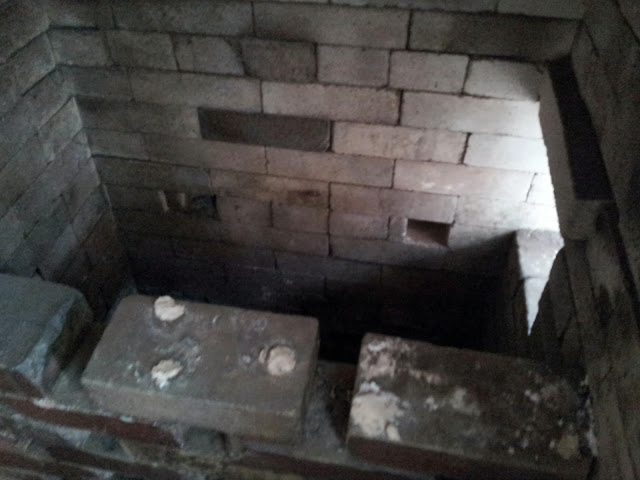
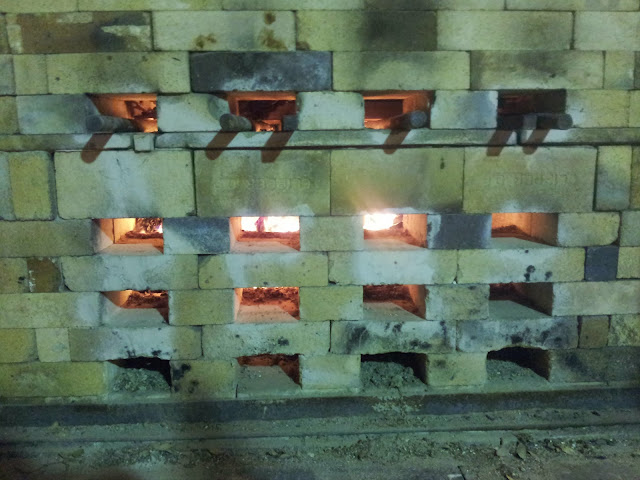
To the left, is a picture of the first chamber where the fire is held. This area is also called the firebox. You can see light pouring in through a small opening. This is where the wood will enter through. On the wall next to the opening are fourteen small gaps in the brickwork. Through these gaps we can control air flow and it is where we will rack out the extra coals that fall to the bottom of the fire box.
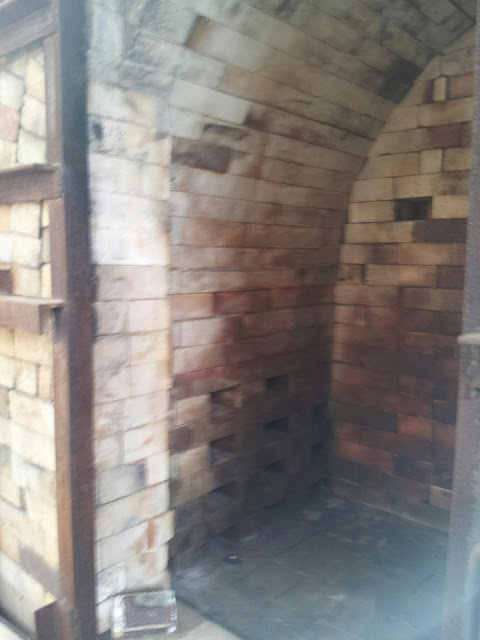
This is the left side of kiln. You can see 12 of the 16 holes where the fire will be sucked through and into the chimney. You can see where the fire has scorched the area around the holes. When you place the pots in the kiln you need to stay clear of this area or you will block the flow of air in the kiln.

The chimney is about two stories tall. When the kiln is being fired, flames will shoot out another 5 or 6 feet from that! The reason it is so tall is so that the smoke and ash that will go flying out of the kiln during the firing won't hit the building. Always call your local fire department before beginning a wood fire. You never know what can happen!

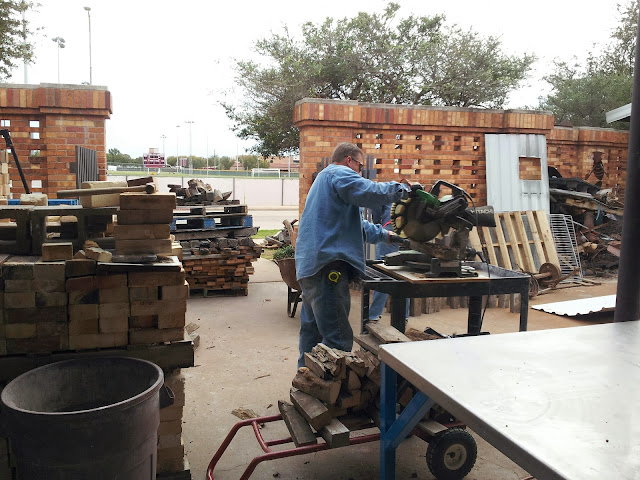
Steve Hilton, our professor, is demonstrating a technique called Carbon Trapping. What he is doing is heating the surface of a glazed pot with a torch. This will force the glaze to mature a little earlier than the others which will make it sticky. As the piece gets fired more ash and carbon will stick to these areas causing the piece to become black in those areas. Essentially he is painting black onto his pot with a blow torch.
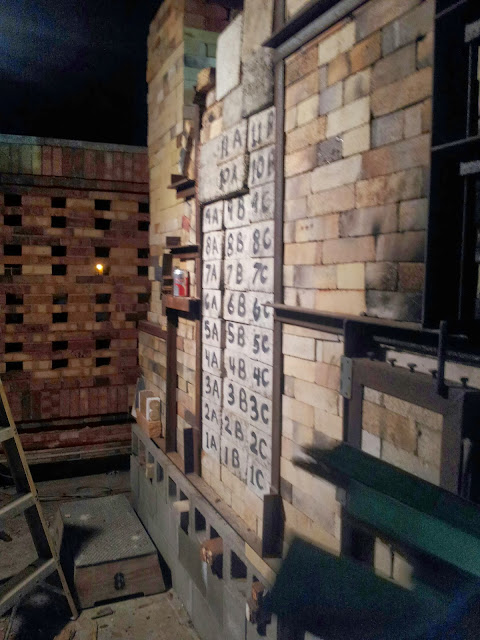
 Once all of the pots have been glazed and sorted the stacking begins. We are trying to get a lot of pots into the kiln so how you stack is very important. As we mentioned before glaze becomes a sticky liquid as it melts. You have to keep the pots far enough away from each other so that the glazes don't fuse the pots together during the firing. You also have to think about what kind of look you want on your pots. Areas close to the wall that divide the first and second chambers will have more ash deposited on the surface and tend to get hotter. Areas in the upper left hand corner of our kiln then to stay cooler and have less ash flow. There are other factors to keep in mind as well, some areas in the kiln will have more oxygen flow and some will have more smoke, both of which can effect the final look of the pot. Also a small piece placed next to a large piece can be shielded from heavy ash flow.
Once the pieces are all stacked and ready to go the second chamber is sealed shut. We are almost ready to begin.
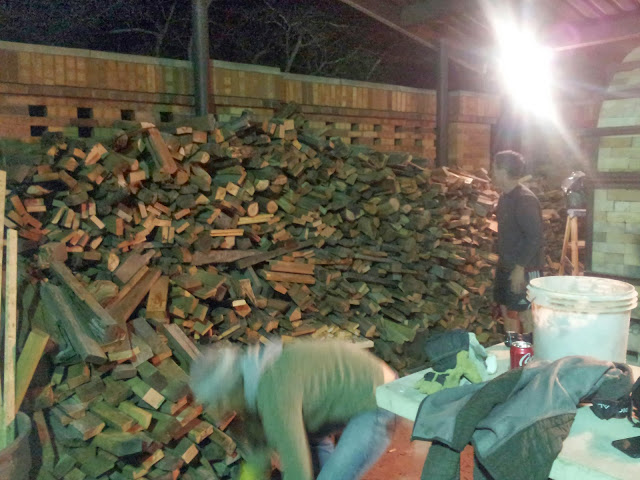
 Before we begin we need to make sure we have enough wood to burn. We fire our wood kiln for 24-48 hours. Some artists and studios will fire a kiln for upwards of 5 or 6 days. They do this to create different desired conditions in the kiln. By holding the temperature at the same temperature for long periods of time, you can create more ash flow.
 Once we have reached our desired temperature we close the kiln up and let the fire die down and cool naturally. It will take about two days to for our kiln to cool this way. Some artists will fire down their kiln, which means that they continue to add wood to their kiln but at slower rates. This allows the kiln to cool down very very slowly. By doing this you create environments in the kiln which allows for the glaze to crystallize creating very interesting looks on the pot.
 There are many different variations when firing a kiln. It takes years of experience and practice to find a method that works best for you. Always take good notes before, during and after every fire to keep track of what works and what doesn't.
After two days of hard preparation, we final light up the fire. Using rolled up newspaper and some dry wood the fire quickly catches and our long hours of firing begins.
 While we are always eager to get the fire going we have to be very careful during the first few hours of firing. There is still moisture in the pots and if we heat them to quickly they can crack or shatter.
 We begin by adding wood every 45 minutes or so to raise the kiln at a rate of 100-200 degrees and hour. Company is a must during these long hours. You can see 6 metal pole sticking out of the kiln. These poles hold the wood that is being thrown into the kiln. As they burn and break apart they turn into coal and fall to the bottom of the fire box. We rack coals out of the kiln periodically and allow fresh hot coals to settle at the bottom of the firebox.
 Once the kiln reaches around 1000 degrees Fahrenheit the pots reach a stage called "red hot" where they literally glow red. At this point we can heat the kiln more quickly without fear of the pots breaking. At this point we add more wood to the kiln every time the temperature in the kiln drops. As the fire grows hotter we are adding more wood every 5-10 minutes and sometimes even faster than that. The coals start to pile up and they are constantly being racked out to make way for more wood.
 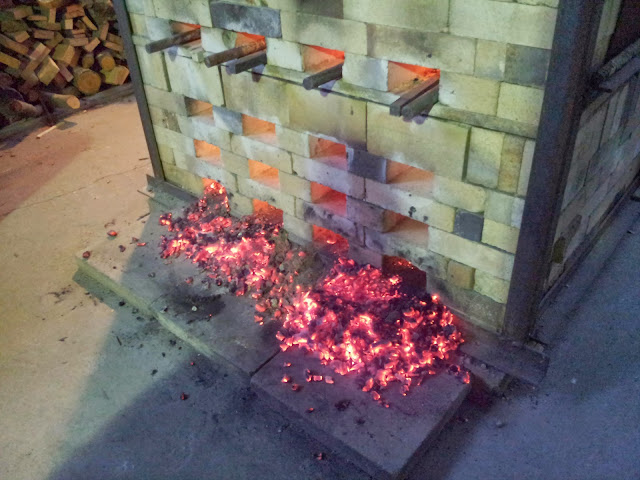 During this firing we reached our desired temperature 24 hours and 15 minutes after we began. This is our fastest firing to date. We found that thinly sliced wood burns more efficiently and hotter than large logs.
 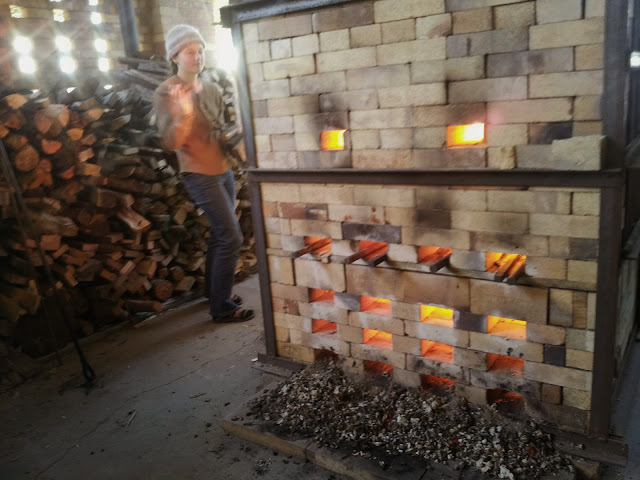 We also had more smoke and ash flying through this kiln than any of our past firings. We believe that because we were firing hotter faster we were able to add more wood every time causing it to reduce before it reached each peak. When you add wood to the kiln the temperature rises at a steady rate once it has burned up it reaches its peak and then begins to fall. At that point you add more wood to continue the climb and it will peak again. At each peak is typically when we see the most reduction in the kiln as the fire burned up all of the oxygen. During this firing, however, we were reducing even as the kiln heated up before peaking.
 Because we hit our desired temperature so quickly we continued to add wood to the fire to allow for even more reduction. Once we were satisfied with our hard work (and we to tired to continue), we closed up the kiln and waited. It took a little over two days for the kiln to return to room temperature and at that point we opened up the kiln hoping for Christmas morning!
Here is a final look at the work that came out of this wood fire. I am very excited about this firing and the variety we were able to get. Some of the pieces we will have to re-fire in a cone 10 glaze kiln to melt some of the ash that deposited as the fire cooled.
If you have any questions about this process, shoot me a message in the comments below. I hope you enjoyed this look at a ceramic wood fire!


